

ESP32-WROOM-32 Setup Guide: How to Get Started with Your First Project
The ESP32-WROOM-32 module is a powerful, low-cost microcontroller with built-in WiFi and Bluetooth, making it perfect for a wide range of IoT projects. Whether you're a beginner or a seasoned maker, this guide will walk you through a detailed, step-by-step process to set up your ESP32-WROOM-32 and start programming right away. We’ll cover everything—from gathering the necessary components to troubleshooting common issues.
What is the ESP32-WROOM-32?
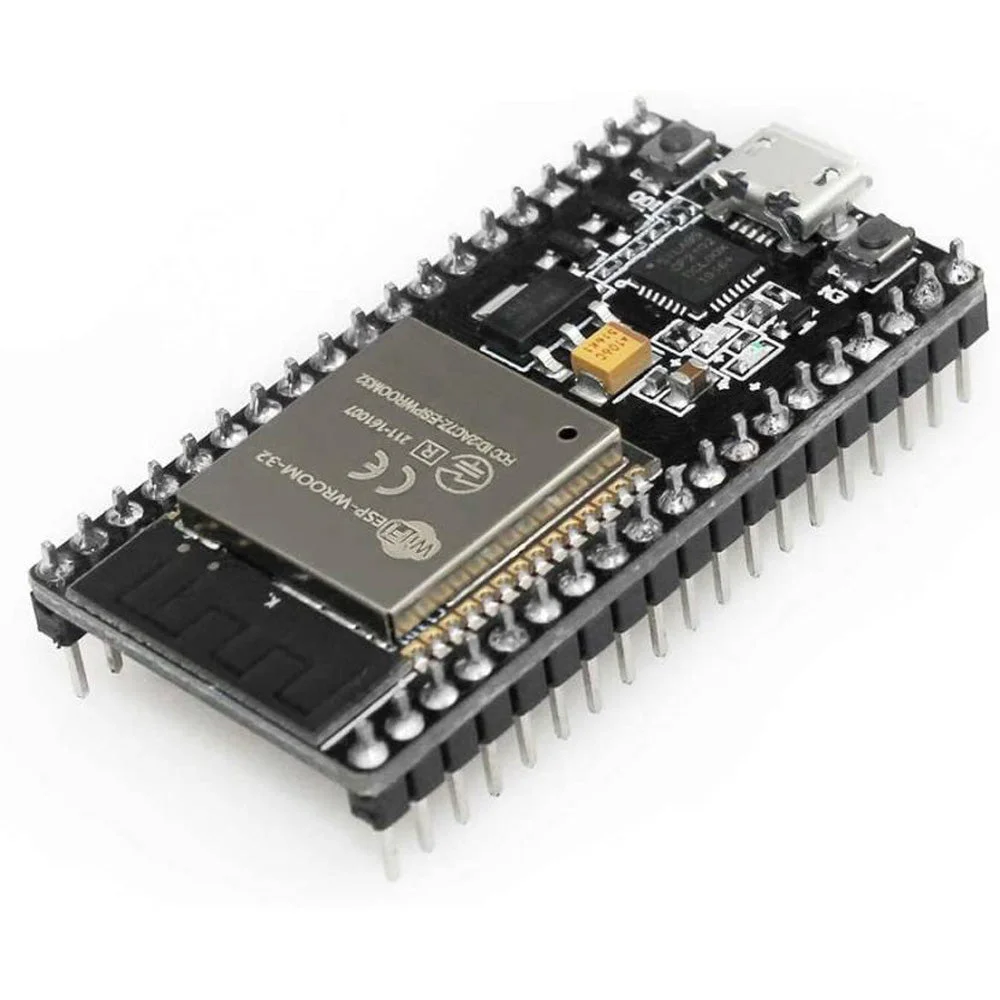
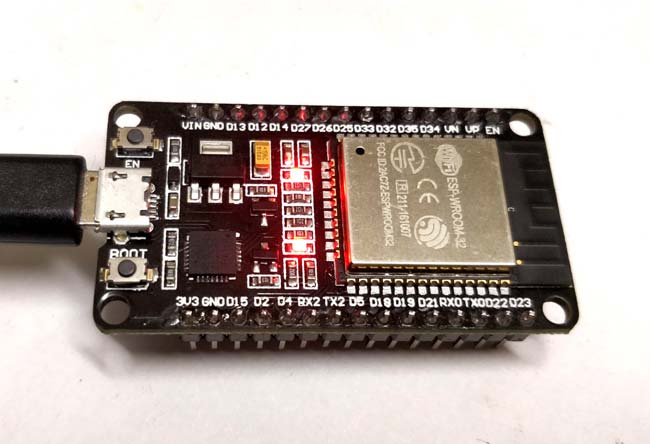
The ESP32-WROOM-32 is an advanced microcontroller module that combines a dual-core processor with WiFi and Bluetooth capabilities. Its compact design, low power consumption, and robust performance make it ideal for smart home projects, wearable devices, and much more.
Key Features
-
Dual-core Processor: Enhanced performance for multitasking.
-
Integrated WiFi & Bluetooth: Ready for wireless communications.
-
Low Power Consumption: Ideal for battery-powered applications.
-
Rich I/O Options: Supports a wide range of sensors and peripherals.
Hardware and Software Requirements
Before starting, make sure you have these essential items:
-
ESP32-WROOM-32 Board:
Buy ESP32 Boards -
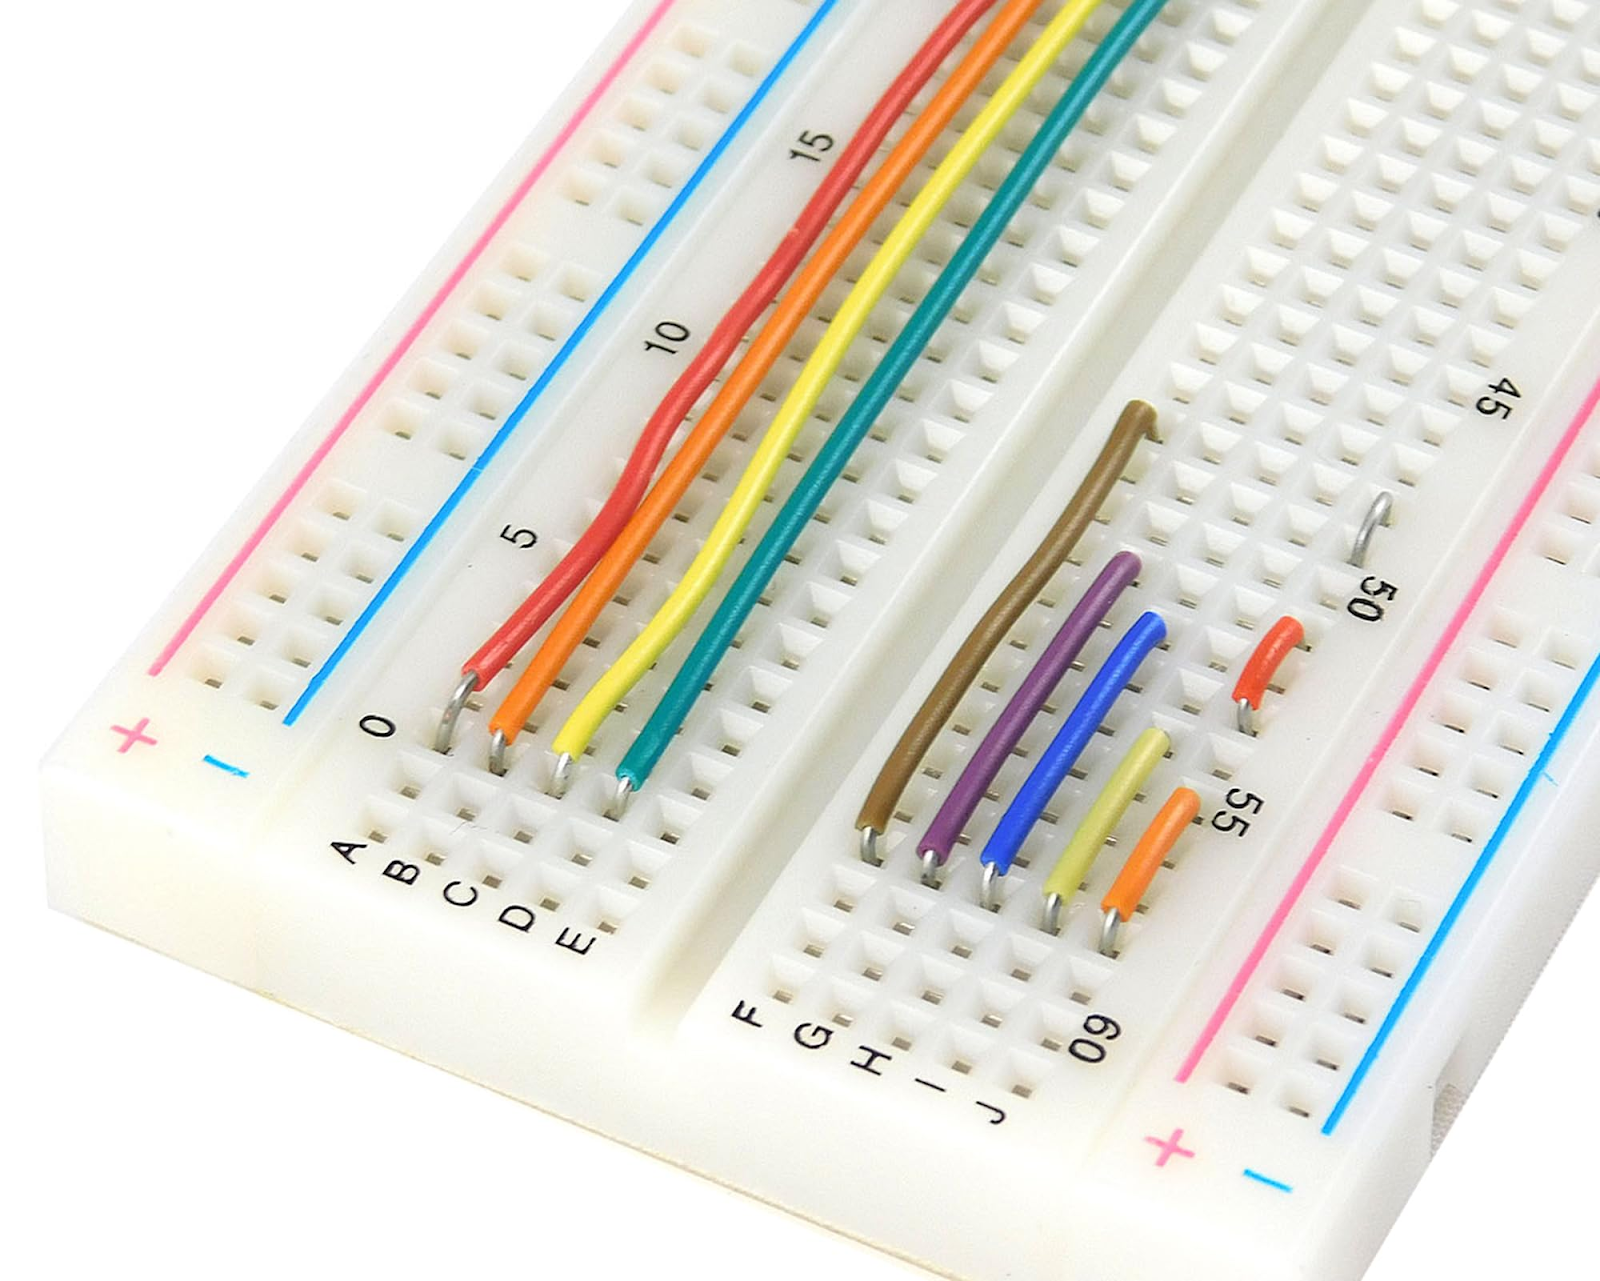
Breadboard:
Buy Breadboards -
Jumper Wires:
Buy Jumper Wires -
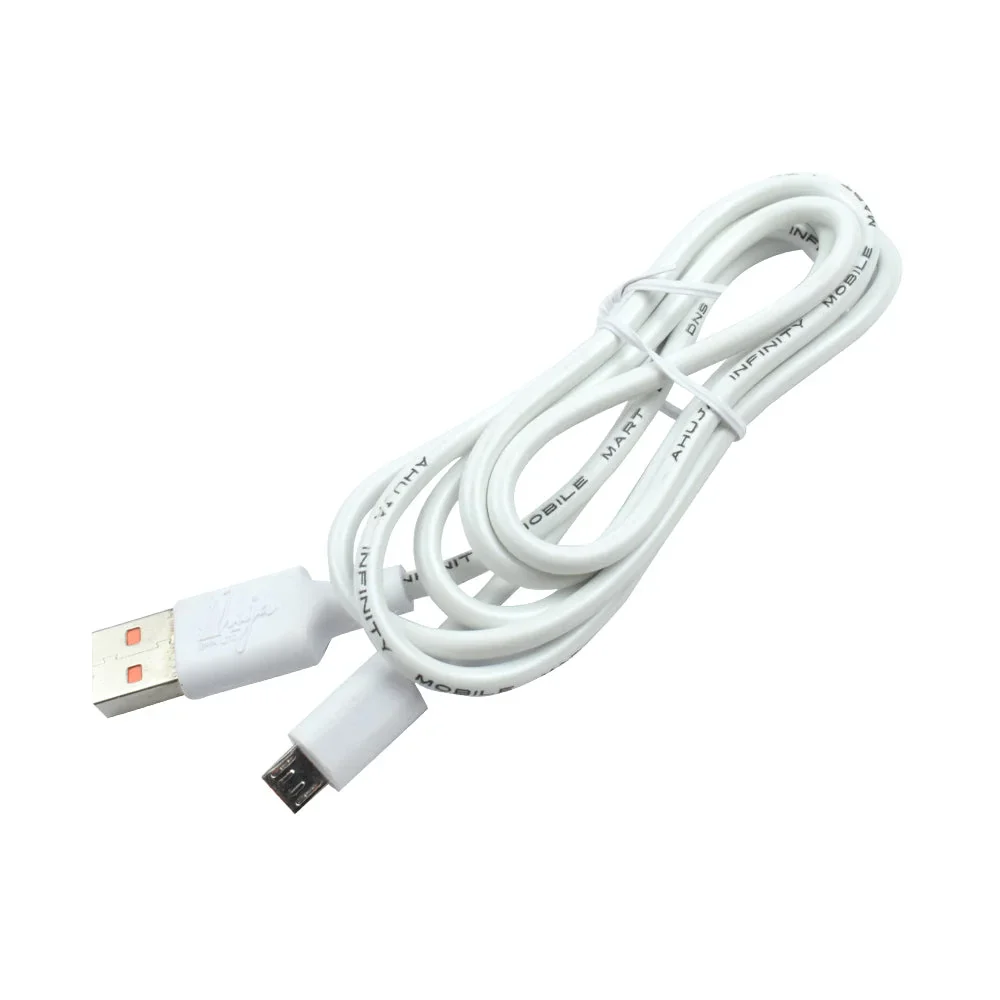
USB Cable:
Buy USB Cables -
Computer:
-
Software Tools:
Detailed Step-by-Step Setup Guide
Step 1: Gather Your Components
-
Purchase Your ESP32 Board:
Begin by ordering the ESP32-WROOM-32 board from Electronify India’s ESP Boards section.
-
Get a Breadboard and Jumper Wires:
These are essential for building and testing circuits. You can find them in our Breadboard and Jumper Wires categories.
-
Prepare a USB Cable:
Ensure you have a reliable USB cable for connecting the board to your computer.
Step 2: Install and Configure the Arduino IDE
-
Download the Arduino IDE:
Visit the official Arduino website and download the latest version for your operating system. -
Install the IDE:
Follow the installation instructions provided on the website. -
Add the ESP32 Board Manager URL:
-
Open the Arduino IDE.
-
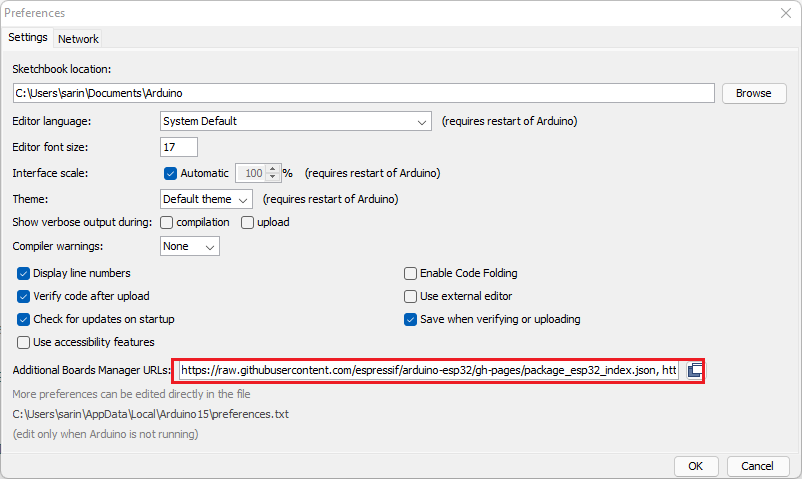
Navigate to File > Preferences.
-
In the "Additional Board Manager URLs" field, add:
https://dl.espressif.com/dl/package_esp32_index.json
-
Install the ESP32 Platform:
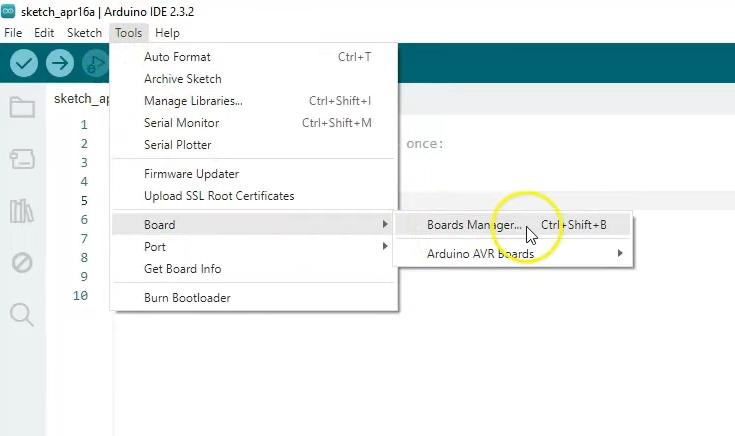
-
Go to Tools > Board > Boards Manager…
-
Search for “ESP32” and install the package provided by Espressif Systems.
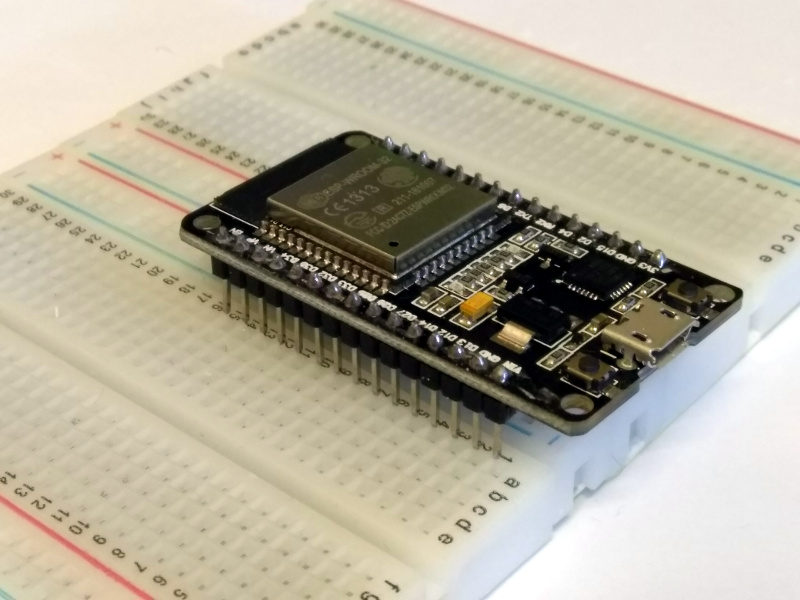
Step 3: Connect Your ESP32-WROOM-32 Board
-
Position the Board on the Breadboard:
Carefully place your ESP32 on a breadboard to allow easy access to its pins.
-
Make the Connections:

-
Use the USB wire to connect the board to your computer.
-
Ensure that the board is properly seated and that connections are secure.
-
Verify USB Connection:
Once connected, your computer should recognize the board. Check your device manager (Windows) or system information (macOS/Linux) for the newly connected USB port.
Step 4: Write and Upload Your First Program
Uploading the "Blink" Sketch Using the Arduino IDE
-
Launch the Arduino IDE:
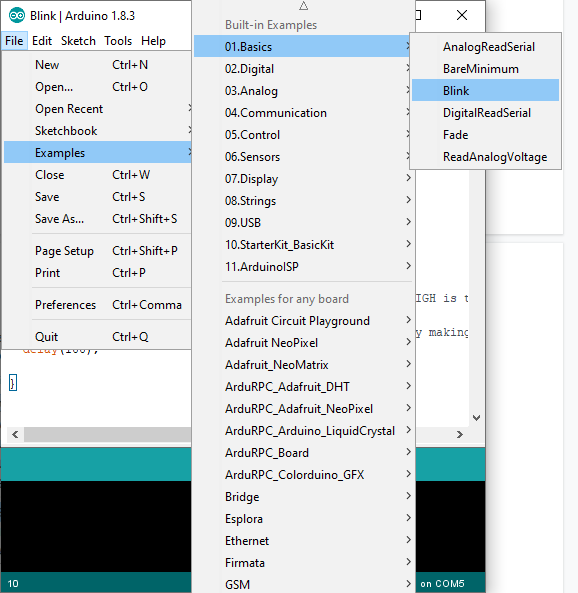
Open the application and go to File > Examples > 01.Basics > Blink.
-
Select the Correct Board and Port:
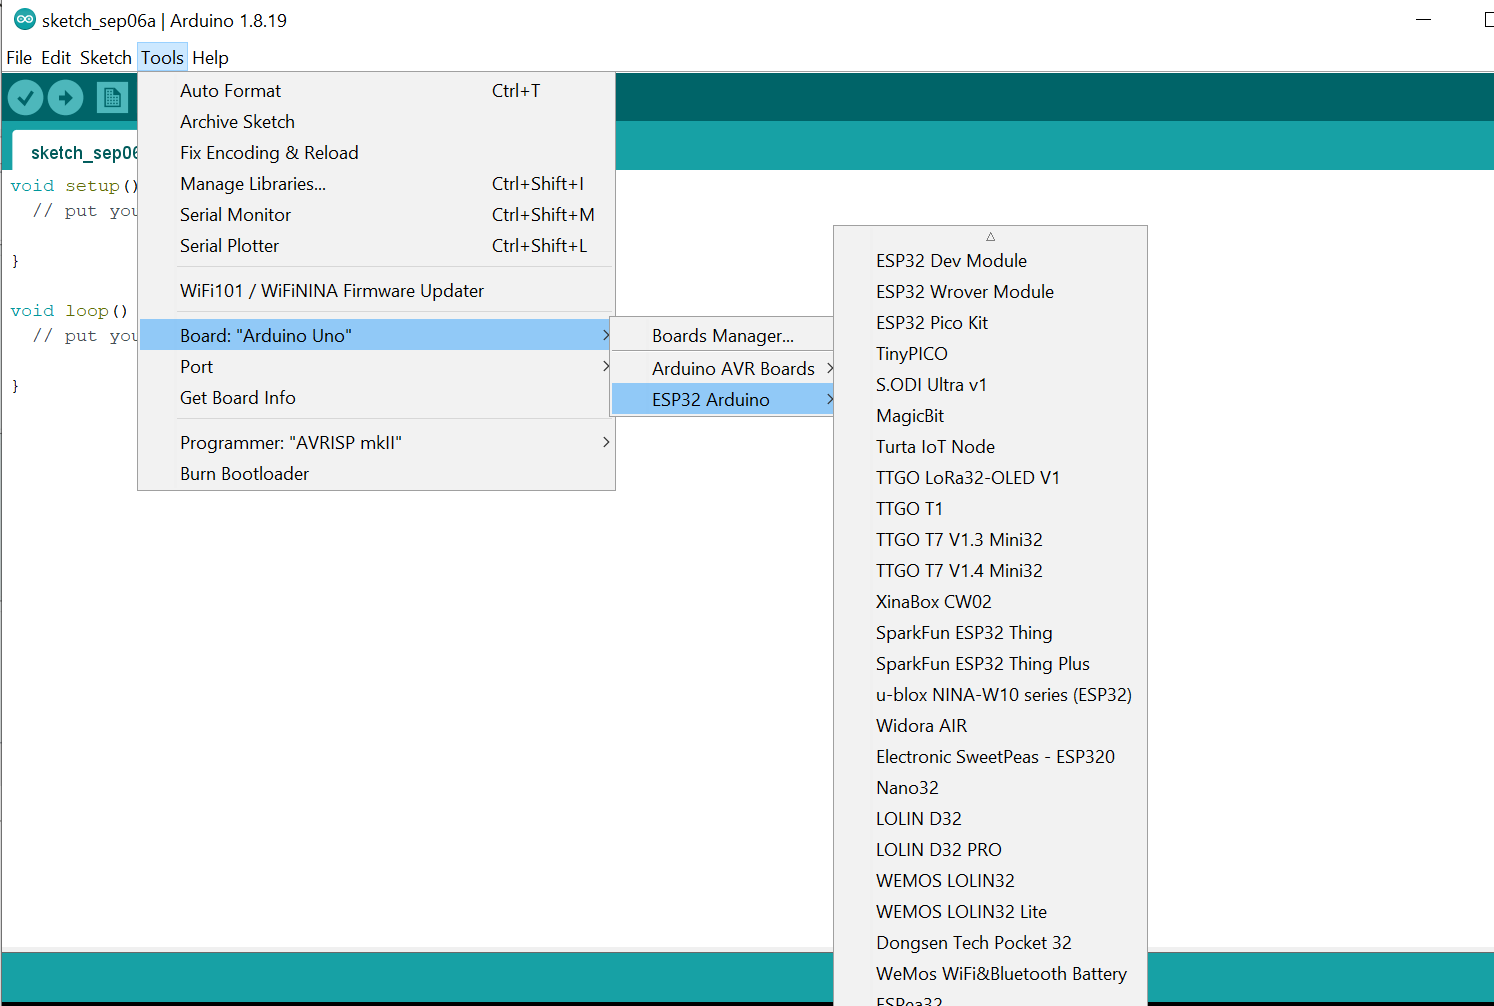
-
Navigate to Tools > Board and select your ESP32 model.
-
Choose the corresponding Tools > Port that matches your connected ESP32.
-
Examine the Code:
The Blink sketch toggles the onboard LED on and off at regular intervals. This simple program confirms that your board is functioning correctly. -
Upload the Sketch:
Click theUpload button. The IDE will compile the code and transfer it to the ESP32. You should see status messages indicating the upload process.
-
Observe the Result:
After a successful upload, the onboard LED will start blinking. This confirms that your setup is complete and your board is ready for more complex projects.
Step 5: Testing and Troubleshooting
If your ESP32 board does not respond as expected, consider the following troubleshooting tips:
-
Check Your Connections:
Ensure that the USB cable is securely connected and that the board is properly seated on the breadboard. -
Verify Driver Installation:
Confirm that the correct drivers are installed for your ESP32 board. Visit the Electronify India website for recommendations on compatible drivers. -
Review Board and Port Settings:
Double-check that you have selected the correct board model and communication port in the Arduino IDE. -
Examine the Code:
Look over your sketch for any syntax errors or typos. Even a small mistake can prevent the code from uploading correctly. -
Reset the Board:
Sometimes, simply pressing the reset button on your ESP32 can resolve connectivity issues.
Step 6: Explore Your First Project Ideas
Now that you’ve set up your ESP32-WROOM-32 and uploaded your first program, here are some project ideas to get you started:
-
Smart LED Controller:
Build a system that allows you to control LED brightness and colour using a smartphone app. -
IoT Temperature Monitor:
Use temperature sensors to monitor environmental conditions and display the data on a web dashboard. -
Home Automation System:
Integrate various sensors and actuators to automate home appliances, making your home smarter and more efficient.
Each of these projects will help you expand your understanding of IoT and microcontroller programming, and you can easily source additional components from Electronify India.
Conclusion
The ESP32-WROOM-32 is an excellent starting point for anyone interested in IoT projects and embedded systems. By following this detailed, step-by-step guide, you can confidently set up your board, write your first program, and start experimenting with innovative projects. For more components and accessories to boost your project, visit Electronify India’s ESP Boards, Breadboard, and Jumper Wires pages.
Happy building, and welcome to the world of IoT!
FAQs
Q1. What is the ESP32-WROOM-32?
Ans. The ESP32-WROOM-32 is a powerful and versatile Wi-Fi and Bluetooth module developed by Espressif Systems. It integrates a dual-core 32-bit LX6 microprocessor, operating at adjustable frequencies from 80 MHz to 240 MHz, delivering up to 600 DMIPS. The module includes 520 KB of SRAM and 4 MB of flash memory, making it ideal for a wide range of IoT applications.
Q2. What are the key features of the ESP32-WROOM-32?
Ans. Key features of the ESP32-WROOM-32 include:
-
Dual-Core Processing: Equipped with two 32-bit Xtensa LX6 microprocessor cores for robust performance.
-
Wireless Connectivity: Supports Wi-Fi 802.11 b/g/n and Bluetooth v4.2 BR/EDR and BLE for seamless wireless communication.
-
Memory: Includes 520 KB of SRAM and 4 MB of flash memory for ample code and data storage.
-
Peripherals: Features 34 programmable GPIOs, ADCs, DACs, SPI, I²C, UART, and more for diverse interfacing options.
-
Power Management: Offers low-power modes with deep sleep currents as low as 5 µA, suitable for battery-powered devices.
Q3. How do I set up the ESP32-WROOM-32 for development?
Ans. To get started with the ESP32-WROOM-32:
-
Install the Arduino IDE: Go to the official website, download, and install the Arduino IDE.
-
Add ESP32 Board Support: In the Arduino IDE, navigate to File > Preferences and add the ESP32 board manager URL: https://dl.espressif.com/dl/package_esp32_index.json. Follow that by selecting Tools > Board > Boards Manager, look for "ESP32," and install the package.
-
Select the Board: Choose the appropriate ESP32 board model from Tools > Board.
-
Install USB Drivers: Depending on your ESP32 module, you may need to install USB-to-UART drivers (e.g., CP210x or CH340) to enable communication between your computer and the ESP32.
-
Upload a Test Sketch: Connect your ESP32 to the computer, select the correct port under Tools > Port, and upload a simple sketch like "Blink" to test the setup.
Q4. Can I program the ESP32-WROOM-32 using the Arduino IDE?
Ans. Yes, the ESP32-WROOM-32 can be programmed using the Arduino IDE. Espressif provides a package that allows the Arduino IDE to be used with the ESP32 series of modules, including the ESP32-WROOM-32. This package includes the necessary board definitions and libraries to enable programming the ESP32-WROOM-32 using the familiar Arduino programming environment.
Q5. What are the power requirements of the ESP32-WROOM-32?
Ans. The ESP32-WROOM-32 operates on a supply voltage of 2.7V to 3.6V. For battery-operated applications, it features low-power modes to save energy.
Q6. What is the range of Wi-Fi and Bluetooth on the ESP32-WROOM-32?
Ans. The Wi-Fi range depends on environmental factors but typically supports a range of several tens of meters. Bluetooth typically has a limited range of about 10 meters.
Q7. What is the difference between ESP32-WROOM-32 and ESP32-WROVER?
Ans. The primary difference between the ESP32-WROOM-32 and the ESP32-WROVER modules is the inclusion of additional PSRAM (pseudo-static RAM) in the ESP32-WROVER. This extra memory is beneficial for applications that require more RAM, such as image processing or machine learning tasks.
Q8. Can the ESP32-WROOM-32 operate on battery power?
Ans. Yes, the ESP32-WROOM-32 supports battery operation and offers efficient sleep modes to extend battery life, making it suitable for portable and low-power applications.
Q9. Is the ESP32-WROOM-32 compatible with Arduino libraries?
Ans. Yes, the ESP32-WROOM-32 supports many Arduino libraries, allowing developers to leverage existing code and resources for rapid prototyping and development.
Q10. What are some common applications of the ESP32-WROOM-32?
Ans. The ESP32-WROOM-32 is versatile and can be used in various applications, including:
-
Home Automation: Control and monitor home devices remotely, enhancing convenience and energy efficiency.
-
Industrial Automation: Implement wireless control and monitoring systems in industrial settings for improved productivity.
-
Wearable Electronics: Develop wearable devices that require low power consumption and wireless connectivity.
-
IoT Projects: Build connected devices that collect and exchange data seamlessly over the internet.
-
Audio Applications: Stream music or implement voice recognition systems with real-time processing capabilities.
